Stacks and the Undo feature
Viktor Ahmeti.2 years ago
If you studied Computer Science, you may have heard of a class called “Data Structures and Algorithms“. Usually this class is filled with abstract terms like HashMap, Linked List, or Merge Sort which will leave you wondering if you will ever need these things in your real job.
Reality is that Data Structures and Algorithms always come up either when you want to optimize a solution (make things go vroom vroom) or when your job is to implement something more complicated than a mere website. People that are building Artificial General Intelligence, Autonomous Robots, and Reusable Rockets surely are experts in DSA, so let’s take a simple step towards that.
In this article we will examine the Stack, which is one of the simplest abstract Data Structures out there, and we will use it to build the Undo/Redo Feature which you use every day. In our case, we will build a basic Photo Editing application where the user can Undo and Redo their changes.


What is a Stack?
Let us first discuss what is a Stack. Think of an empty table. We will place books on this table one by one, one over the other. We place the following books in order: The Hitchhiker’s Guide to the Galaxy, Dracula, His Last Bow. The table will now look like this:

Congratulations, you have just created a Stack! A Stack is simply some elements stacked on top of one another. The thing is that if I now tell you to give me Dracula, you cannot simply pull it from the middle. In a Stack, taking elements is controlled: you can only take the element at the top. Similarly, you can only add an element at the top. This feature is sometimes called Last in First Out, so the last element that was put in is the first element to come out.
When you take an element from the top of the stack we say that you pop from the stack. When you put an element in we say that you push in the stack. There’s another function called peek which means looking at the top element without popping it.
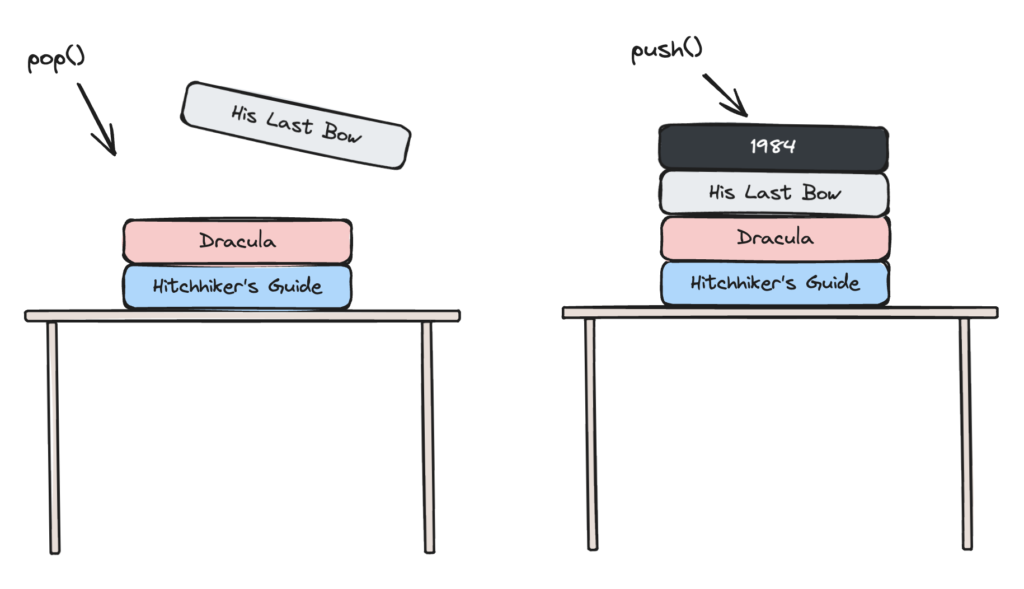
You can try implementing your own Stack using languages like Java or C#. You would create a class called Stack which in the background will have an array and you will add the push(), pop(), peek(), isEmpty(), and isFull() methods. It is a good exercise so I would really suggest you try it. In JavaScript, however, we can use a simple array like a Stack since all the same functions are supported:
let myStack = ['The Hitchhiker\'s guide to the Galaxy', 'Dracula', 'His Last Bow']

myStack.pop() //His Last Bow

myStack.push('1984')

myStack.length === 0 //similar to isEmpty()
How do we go from this to Undo/Redo?
Let’s start with the Undo feature since it is simpler. Imagine that a user is writing on a textbox and we want to implement Undo so the user can go back in time to what he wrote. If you think about it for a bit, using a stack a Stack of strings actually creates a trivial solution.
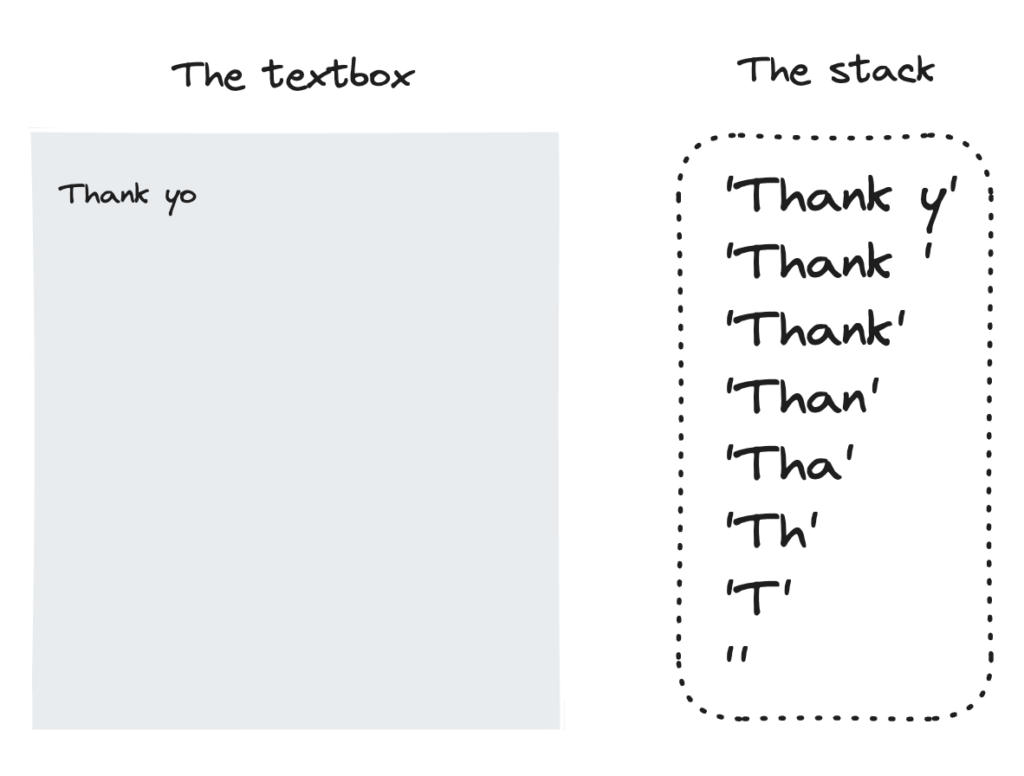
Every time a change occurs in what the user is typing, we push() the whole current string in the Stack. Notice the state of the Stack in the above picture which contains the whole history of the states of the textbox. Now, if the user presses Ctrl+Z, we simply pop() from the Stack and update the textbox with the new string; in this case ‘Thank y‘.
If you’re paying attention you will notice that we are storing a lot of unnecessary information in the Stack. It would be better if we would store only the differences between the states instead of the whole new state, but we won’t deal with that today. Just keep it in mind.
If you’ve read this far you are now obligated to stop and think how the Redo feature will be implemented before I explain it. Okay, so the secret to implementing the Redo feature is; I know you didn’t stop to think about it yourself, try again.
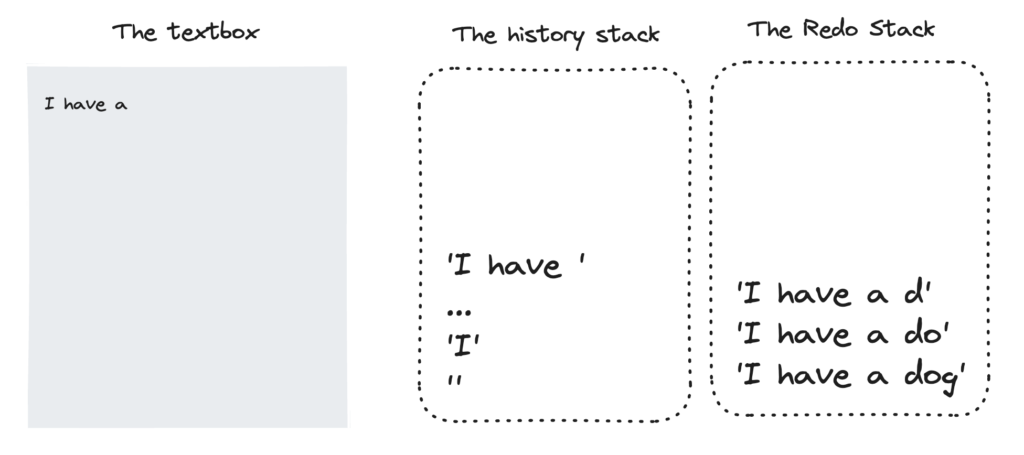
Okay for real now. The most basic way to implement Redo is to use yet another Stack. Every time we pop() from the History Stack, we push() the current state in the Redo Stack. Thus, the Redo Stack will remember the future states of the text, and we can pop() from it when we need to Redo.
We can now pop and push between the History Stack and the Redo Stack to play around with the state of the application. The tool I use to create these illustrations is called Excalidraw, an open-source tool for doing illustrations. If you go and try it out you will see that they also have an Undo/Redo feature.
Why am I telling you this? Well, it turns out that Excalidraw implements this feature exactly as we discussed here. I will show you some code from their history.ts file in GitHub where they do exactly what we said (only the lines with comments are important):
//The function for undo()
undoOnce(): HistoryEntry | null {
  if (this.stateHistory.length === 1) {
    return null;
  }

  //pop() the history stack
  const currentEntry = this.stateHistory.pop();

  const entryToRestore = this.stateHistory[this.stateHistory.length - 1];

  if (currentEntry !== undefined) {
    //push() the current state to the Redo Stack
    this.redoStack.push(currentEntry);
    return this.hydrateHistoryEntry(entryToRestore);
  }

  return null;
}
Redo is implemented exactly as we discussed. There is one edge case however, where the user does a few Undo and then actually makes a change. In this case the user cannot Redo anything anymore since he is taking another path – thus the Redo Stack needs to be cleared. You can also find this exact thing in the file I showed you exactly like this:
pushEntry(appState: AppState, elements: readonly ExcalidrawElement[]){
//...
//...
// As a new entry was pushed, we invalidate the redo stack
this.clearRedoStack();
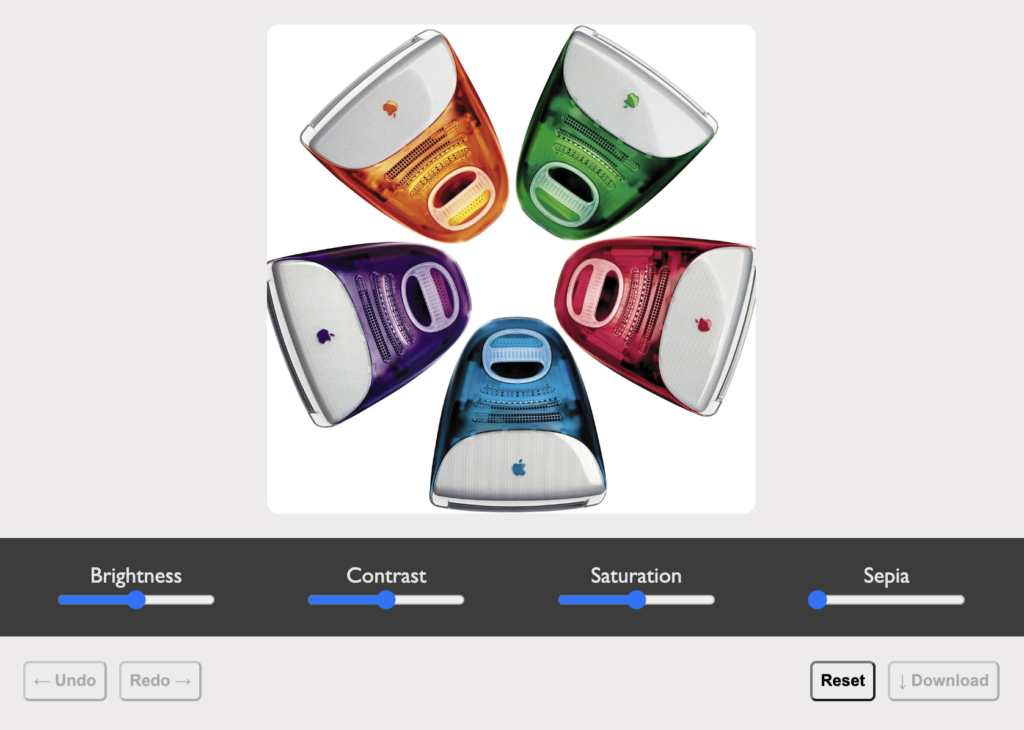
}Image Editing app with the Undo and Redo features
First off, try out the app to see what we will build and check out the GitHub Repository for all the details. To edit an image we will use the CSS filter property. It is supported in all of the major browsers and allows us to apply filters for things like contrast, saturation, brightness, blur, and so on. The HTML and CSS for this project are rather simple so I will cover just the key points. The structure of the page is like so:
<div class="photo-container">
    <img src="imac.webp" id="photo">
</div>

<div class="controls-container">
    <div class="control-container">
        <label for="brightness">Brightness</label>
        <input type="range" min="0" max="200" name="" value="100" id="brightness">
    </div>
    <!-- More controls here !-->
</div>

<div class="buttons">
    <button id="undoButton" disabled>← Undo</button>
    <button id="redoButton" disabled>Redo →</button>
</div>
Notice that the controls are simple range inputs which give the user a slider from min to max. Furthermore, the Undo and Redo buttons are disabled by default. The CSS is pretty standard and you can read through it if you like. Let’s examine the JavaScript.
You may have noticed throughout the text that we have used the word state. We want to save the state of a system inside a variable. In the case of a textbox we could save the state in a String. In our case, the state will be an object with the values of the filters:
//a function to return the default state
let getDefaultState = () => {
    return {
        brightness: 100,
        contrast: 100,
        saturate: 100,
        sepia: 0
    };
}

//the initial state is the default state
let state = getDefaultState();

//a helper function to return a clone of the current state
//needed because we are using a mutable state variable
//don't worry about it too much
function cloneCurrentState(){
    return JSON.parse(JSON.stringify(state));
}
You can notice above that the current state of the image is stored in a global variable called State, which we will modify constantly. Let’s see some more definitions:
//an array with the UI controls
let controls = [];
controls.push(document.getElementById("brightness"));
controls.push(document.getElementById("contrast"));
controls.push(document.getElementById("saturate"));
controls.push(document.getElementById("sepia"));

//our two stacks :)
let savedStates = [];
let redoStack = [];
The updateState function is one of the most important functions in the code since it accepts a new State object and makes all the necessary changes in the UI:
let updateState = (newState) => {
    //update the global state variable
    state.brightness = newState.brightness;
    state.contrast = newState.contrast;
    state.saturate = newState.saturate;
    state.sepia = newState.sepia;

    //update the state of the controls to represent the new state
    controls.forEach((control) => {
        control.value = state[control.id];
    });

    //enable or disable the undo and redo buttons
    undoButton.disabled = savedStates.length === 0;
    redoButton.disabled = redoStack.length === 0;
    downloadButton.disabled = savedStates.length === 0;

    //make the changes in the UI
    applyFilters(newState);
}

//the function that makes the changes, plain and simple
let photo = document.getElementById("photo");
let applyFilters = (state) => {
    photo.style.filter = `brightness(${state.brightness}%) contrast(${state.contrast}%) saturate(${state.saturate}%) sepia(${state.sepia}%)`;
}
How do we actually use the updateState function, though? Whenever one of the inputs changes we want to update the state. This is why we attach event listeners to the controls so they update the state accordingly:
controls.forEach((control) => {
    control.onchange = () => {
        //our cute trick to empty the redo stack :)
        redoStack = [];

        //create the new state
        let newState = JSON.parse(JSON.stringify(state));
        newState[control.id] = parseInt(control.value);

        //push the current state to the history stack
        savedStates.push(cloneCurrentState());

        updateState(newState);
    }
});
With this in place now we can create our simple Undo/Redo feature with two functions. Let’s start with Undo which pops the History Stack and pushes to the Redo Stack:
let undoButton = document.getElementById("undoButton");
undoButton.onclick = () => {
    let previousState = savedStates.pop();

    if(previousState){
        redoStack.push(cloneCurrentState());
        updateState(previousState)
    }
}
No need to explain since it reads like a book. Here’s the next one:
let redoButton = document.getElementById("redoButton");
redoButton.onclick = () => {
    let nextState = redoStack.pop()

    if(nextState){
        savedStates.push(cloneCurrentState());
        updateState(nextState);
    }
}
Honestly, that’s all there is to it. There a few more functionalities like reset and download which you can find in the Repository but which are not important for our discussion.
Conclusion
We saw what a Stack is and exactly how it relates to the Undo and Redo features. I hope you learned something new today and this was worth your time. If not, reality unfortunately has no Undo feature. If you liked this you might also like How to build a Piano using JavaScript. Subscribe to my newsletter below if you don’t want to miss these posts.
← All blogs